Tuesday, April 19, 2011

Cuddy

A Cuddy is a small cabin usually without standing head room. There is about one inch of room above my head when I am sitting in the cabin. That is sitting on the bunk with out any cushions. Graham designed the cabin to be as low as possible and still provide sitting head room. A lower cabin means less weight, less wind-age, and less interference with visibility from the cockpit.

To provide maximum headroom the cabin is built without beams. The roof is self supporting. It is constructed of three layers of 4mm plywood laminated in place over a mold.


The cabin is about four and a half  feet wide and about six feet long. This makes for a good size project. The cabin is one of the steps in the boat that I thought were a little intimidating. Lots of curves, lots of unknowns.


Well here we go. First the temporary forms are set up in the cabin.


Then one layer at a time 4mm plywood is bent to the forms.

The next two photos show the second layer going on. That is all Graham put on his boat Southern Skimmer. He told me he has felt the roof start to oil can when he was walking on it so he specified three layers in the plans.


The clamps are off and the second layer is complete.


Here I am using a notched spreader to apply thickened epoxy to the roof in preparation for the third layer.


Then on goes the final layer. I am using screws, battens, staples and clamps to try to apply even pressure over the entire area. Fortunately it is cool in the boat shop around 50 degrees Fahrenheit so I have some time before the epoxy starts to set up. This is similar to the way the hull was laminated.


This is the third layer clamped in place.

Next is one of the tricky parts. The roof which was initially made over size has to be cut back so that a stick or a piece of plywood laying against the two temporary forms will just make contact with the roof. I used a notched stick to trace a line in the top of the cabin, but there is a lot of fudge work involved especially coming around the corners.


Next the sides of the cabin are bent into place. The grain of the plywood must be aligned with the area of greatest curvature.


There will be two layers on the sides and the first one is on.


After I completed the sides I removed the upper mold and the temporary roof beams. I left the lower mold in place to give a little stability to a relatively fragile assembly. At this point everything is held together by a thin layer of glue where the cabin sides meet the edge of the roof. Gluing onto the edge of a piece of plywood makes for a weak joint, so the cabin was very carefully lifted off the boat and flipped upside down so the joint could be reinforced.


Here the cabin is inverted and I have started to lay a large fillet into the seam between cabin top and sides.
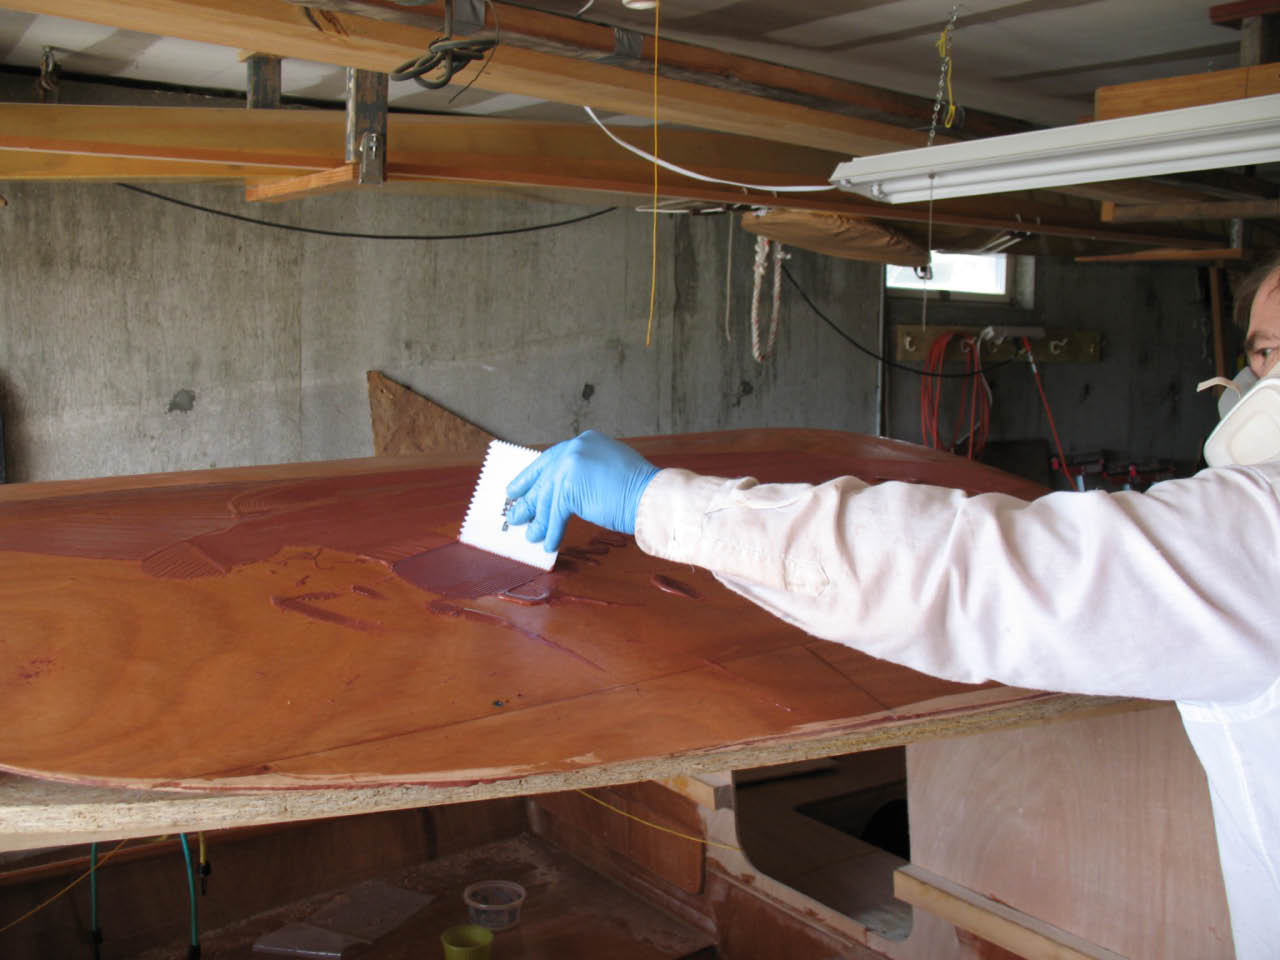
In order to lay a nice smooth fillet you might think you would want your thickened epoxy mixture to be smooth and creamy, but it ain't so. And the bigger the fillet the thicker and dryer the mixture should be.


That is some good stuff. Dab it on and hit it with a spreader and you have an even and surprisingly smooth fillet.


After the fillet was firmed up a little I added two layers of 6oz tape. I cut strips four inches wide from some left over cloth. Once the joint was reinforced I could round over the joint from the outside. There was a couple of inches of material sticking up in some places where the side pieces overlapped the roof. I cut the bulk of this off with the saber saw. I thought I would try out the grinder with an abrasive disc and it proved quite effective. Not a fine woodworking tool, but it did a nice job here.


The grinder can leave dip and bumps in the cabin. The long board is slow but it can help make the curves fair.


Once the joint was as round and fair as I could stand to make it everything got a coat of epoxy and the joint got two layers of the home made 6 oz tape. Now the cabin is fairly strong and I can move it around without worrying that I might stress the joint.


I decide to paint the interior of the cabin white. I tried using System Three water reducible polyurethane paint.
The lack of obnoxious fumes made the paint very pleasant to use. However even though the boat shop was a cool fifty something degrees and I used a sprayer to raise the humidity I found the paint dried very quickly and so was difficult to apply smoothly with a roller.It came out decent if you do not look too closely.


I decided to add a hatch for added ventilation and hopefully the ability to reef the main from a secure location.


I did not want the hatch any bigger than absolutely necessary. I made an opening out of scrap lumber clamped together and made adjustments until I found a size I could just comfortably squeeze through. 15 inches wide and 12 inches fore and aft. I did not really have a plan. I just figured I needed a raised level surface with a lip to keep out water. The cabin roof is curved so I spent a lot of time shaping and fitting the pieces.

I found several feet of some very thin and even 1/16 by 1 1/2 scrap. I soaked this a couple of days in water and then was able to bend it to a form and let it dry. I laminated three layers of this on the inside to make a lip or coaming around the hatch opening. I don't know if this is the right way to make a hatch but it certainly was a long way.

Now all I have to do is make the hatch cover.

I wanted to keep the hatch as light as possible so I used 4mm ply with a layer of glass on the underside.

Nest is returning the cabin to the boat and reattaching it to the cabin bulkhead. Quite a while has past and some glassing and filleting has occurred so not surprising a little filleting needed to be removed and some persuasion applyed before the cabin settled onto the cabin bulkhead.

Wednesday, April 13, 2011

Forward Compartment

There is a sealed flotation compartment in the bow. At the bottome of this compartment a stainless bolt comes through the hull and is bonded to an aluminum strip that will in turn connect to the base of the main mast.


Here you can see that the compartment and the underside of the deck are well sealed with epoxy.


This floor forms the base of the main mast tabernacle.

Sunday, April 10, 2011

Spring is here.

My winter was spent in Virginia. Doing things that needed to be done that are alas not as much fun as boat building.

But Spring has arrived and Sally and I are back in Rhode Island where Skorpa has been waiting patiently.


Building the cabin is the big job that is next on the agenda. The EC 22 cabin has lots of curves and looks quite stream lined. It is made by laminating layers of 4mm ply over a set of molds.

Cutting and installing the cabin bulkhead is the first step.

The bulkhead is inclined forward 6 degrees. That is about 2.5 inches at the end of the two foot level.

This is a good size bulkhead so it required a variety of screws clamps and props to hold it in place while the epoxy set up.


Once the bulkhead was in place I laminated a beam in place across the top.


I wanted the beam to be 3/4 wide and one inch deep. In one piece it is way to stiff to take the bend across the top of the cabin. But in a  piece 3/4 wide by 5/16 deep the curve was easily made. After the first strip had set I laminated in the other two.